As a special material widely used in packaging, printing, decoration, and other fields, hot stamping foil has slitting accuracy that directly affects the subsequent hot stamping effect. For operators new to hot stamping foil slitting machines, mastering standardized operating procedures is crucial. Next, follow 7 steps to complete the cutting of the first roll of hot stamping foil.
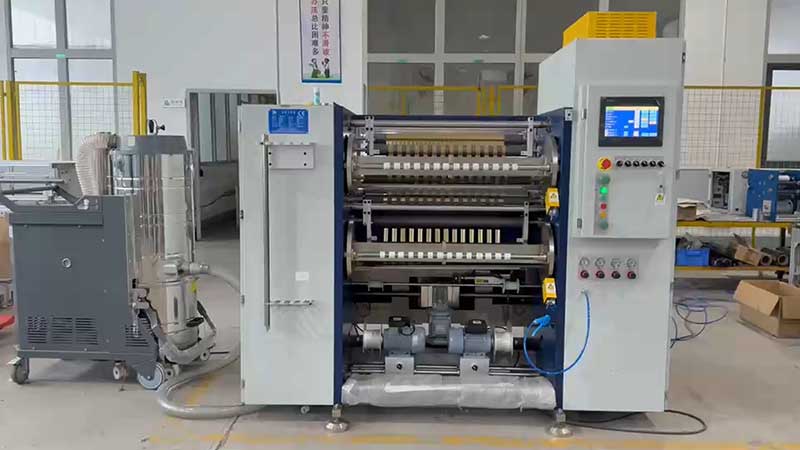
Step 1: Familiarize yourself with the main structure of the equipment
Before starting the machine, let's first understand the core components of the slitting machine:
• Roll reel: Used to secure large rolls of hot stamping gold foil raw materials
• Traction roller group: Smooth material conveying
• Slitting Blade Group: Round or flat blades, responsible for cutting
• Reel Scroll: Collects small rolls after slitting
• Tension control system: adjusts the tightness of the material during operation
• Length Measuring Device: Measures slitting length
Familiarity with the location and function of these components is a prerequisite for safe operation.

Step 2: Check the materials and prepare the tools
Check whether the hot stamping foil roll to be cut is intact in appearance, and whether there are any wrinkles, damage, or moisture. Confirm that the material width and thickness match the order requirements.
Prepare the following tools:
• Utility knife or scissors
• Tape measure or ruler
• Gloves (to prevent scratches and sweat stains from contaminating the foil surface)
• Cleaning cloth (wiping the surface of the rollers)
Check that there are no debris around the slitting machine and ensure the emergency stop switch functions properly.
Step 3: Install the raw material roll and film penetration
1. Lift or lift the large roll of hot stamping gold foil onto the roll rack, place it into the roll loading reel, and lock it tightly.
2. Adjust the centering device of the unwinding reel to ensure the raw material coil is aligned with the equipment centerline.
3. Manually pull the material head and pass through it in sequence: unwinding guide roller → tension detection roller → slitting blade group→ and each winding guide roller.
4. Stick the feed tip flat onto the winding core tube and secure two to three places with tape.
Keep the material flat during the film penetration process; do not twist or flip it.

Step 4: Set the slitting parameters
Enter the following parameters according to the process sheet:
• Slitting width: Adjust the tool group position so that the spacing between each blade equals the required roll width
• Winding length: Set the meter count for each small roll
• Winding tension: When the foil is thin, the tension should be low (usually 20-50N) to avoid stretching and deformation
• Slitting speed: For the first run, it is recommended to use a low speed (30-50 meters/minute) for trial cutting
Blade pressure should be moderate: cutting too shallow is unreliable; too deep will damage the blade or cause burrs.
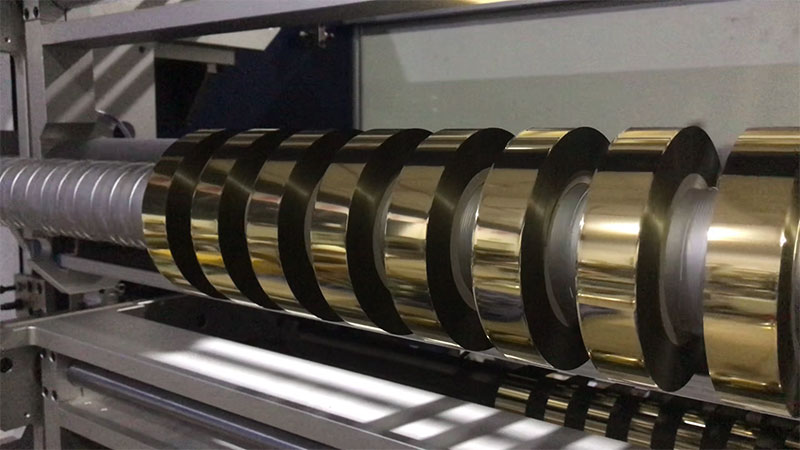
Step 5: First-piece debugging and trial cutting
First, jog and run 1-2 meters, then stop and check:
• Slitting edges: The cut should be neat, free of burrs, and free of brushing
• Width dimensions: Use calipers to measure the width of each roll, with tolerance within the allowable range (usually ± 0.5mm)
• Material surface: No scratches, no indentations, no wrinkles
If any issues are found, the blade position or tension is fine-tuned, and the cutting is repeated until passed.

Step 6: Officially run the first volume slit
After confirming all parameters are correct and the trial cut is qualified:
1. Start the device and gradually increase to the set speed
2. Observe the material's operating condition throughout—no misalignment, wrinkling, or adhesion
3. Check the rewinding end face at intervals to ensure it is neat
4. Press Emergency Stop immediately if abnormal noises or vibrations occur
During the operation of the first roll, operators should stay focused and not leave their posts.
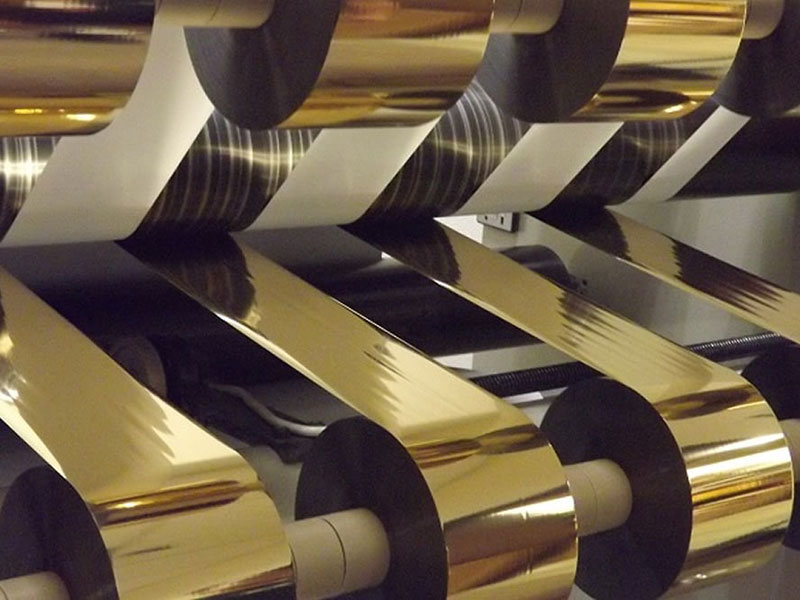
Step 7: Unloading and quality confirmation
After the slitting reaches the set length, the equipment automatically stops (or manually stops):
1. Remove the finished small rolls from the reeling and gently place them on a tray lined with soft materials
2. Check each roll: end face neatness, width consistency, and cut quality
3. Label specifications, meter size, and production date
4. Clean foil shavings and dust from the equipment to prepare for the next roll
First operation reminder:
• The surface coating of the foil foil is fragile; excessive winding tension can easily cause "white spots" during stamping
• The blade edge needs to be replaced regularly, usually inspected every 50,000 to 100,000 meters per minute
• Different brands and colors of hot stamping foil have varying sensitivity to tension; it is recommended to keep record parameters each time
Once you complete these seven steps, you will successfully finish cutting the first roll of gold foil foil. As you gain experience, you will gradually master advanced techniques such as tension matching and fine-tuning blade angles for different material specifications. Standardized operations and safety first, efficiency and quality will naturally follow.


 Cold Foil Slitter
 Card Print Ribbon Rewinder
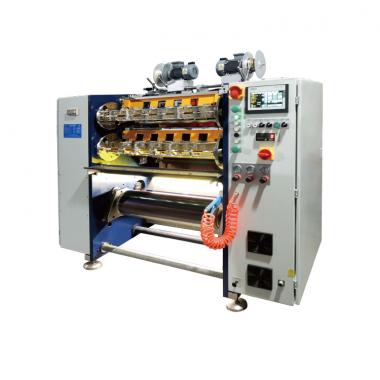 Card Print Ribbon Slitter
 Holographic Foil Slitter
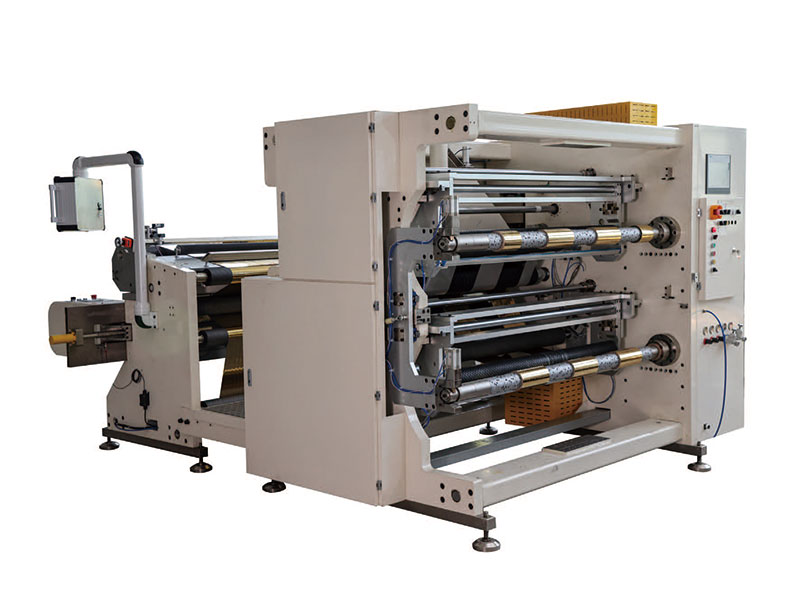 Hot Stamping Foil Slitter (RSDS7H) 1350
 Hot Stamping Foil Slitting Machine
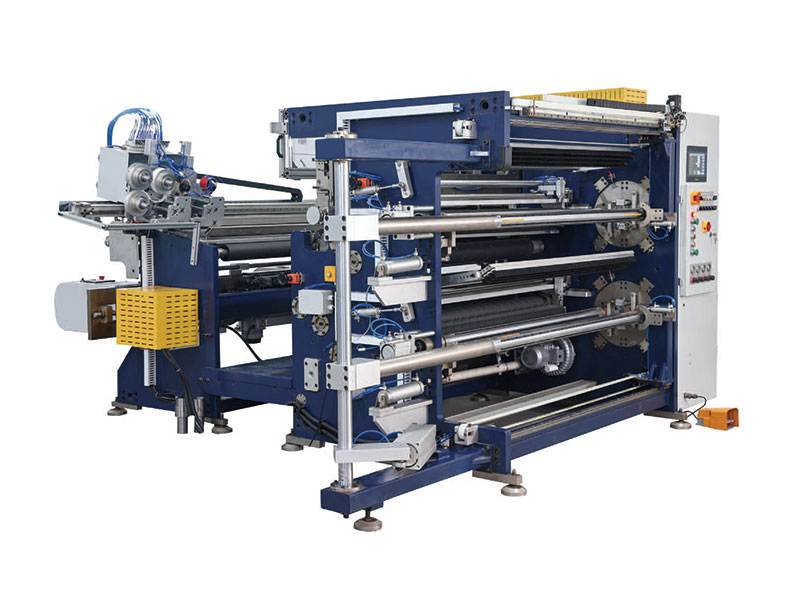 Hot Stamping Foil Slitter RSDS7H 1350 PLUS